Libbitcoin: Spend a Non-Native Segwit Multisig Output

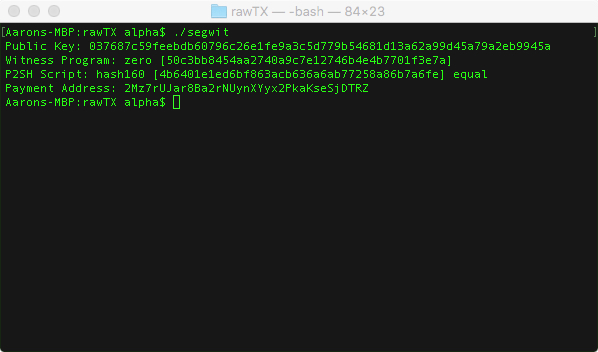
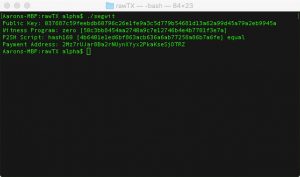
After you’ve constructed your P2SH-P2WSH address your going to want to be able to spend the outputs via segregated witness.

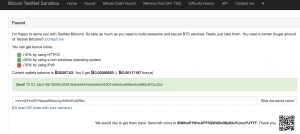
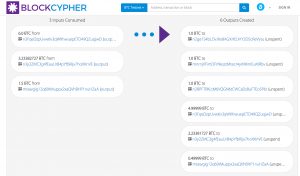
In order to follow along with this tutorial, first go to a faucet and send some tesnet coins to your multisig address.

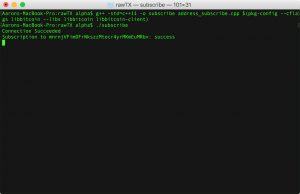
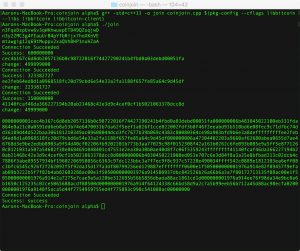
The program we are going to write is going to use the libbitcoin-client functions previously described in transaction tutorials for getUTXOs and broadcastTX


#include <bitcoin/bitcoin.hpp>
#include <bitcoin/client.hpp>
#include <string.h>

using namespace bc;
using namespace bc::wallet;
using namespace bc::machine;
using namespace bc::chain;

points_value getUTXOs(payment_address Addy, uint64_t amount)
{
	client::connection_type connection = {};
	connection.retries = 3;
	connection.timeout_seconds = 8;
	connection.server = config::endpoint("tcp://testnet1.libbitcoin.net:19091");
	client::obelisk_client client(connection);

	points_value val1;
	static const auto on_done = [&val1](const points_value& vals) {

		std::cout << "Success: " << vals.value() << std::endl;
		val1 = vals;
		

	};

	static const auto on_error = [](const code& ec) {

		std::cout << "Error Code: " << ec.message() << std::endl;

	};

	if(!client.connect(connection))
	{
		std::cout << "Fail" << std::endl;
	} else {
		std::cout << "Connection Succeeded" << std::endl;
	}

	client.blockchain_fetch_unspent_outputs(on_error, on_done, Addy, amount, select_outputs::algorithm::greedy);
	
	client.wait();
	
	
	//return allPoints;
	return val1;


}
void broadcastTX(transaction tx)
{
	client::connection_type connection = {};
	connection.retries = 3;
	connection.timeout_seconds = 8;
	connection.server = config::endpoint("tcp://testnet3.libbitcoin.net:19091");
	client::obelisk_client client(connection);

	if(!client.connect(connection))
	{
		std::cout << "Fail" << std::endl;
	} else {
		std::cout << "Connection Succeeded" << std::endl;
	}
	
	static const auto on_done = [](const code& ec) {

		std::cout << "Success: " << ec.message() << std::endl;

	};

	static const auto on_error2 = [](const code& ec) {

		std::cout << "Error Code: " << ec.message() << std::endl;

	};

	client.transaction_pool_broadcast(on_error2, on_done, tx);
	client.wait();
}

After those we are going to use the helper functions we defined in the create address tutorial to build the witness script and redeem script.


script getWitnessScript(ec_public key1, ec_public key2, ec_public key3) {
	//make key list
	point_list keys {key1.point(), key2.point(), key3.point()};
	//create 2/3 multisig script
	script multisig = script::to_pay_multisig_pattern(2u, keys);
	return multisig;
}

script getRedeemScript(ec_public key1, ec_public key2, ec_public key3) {
	//create 2/3 multisig script
	script multisig = getWitnessScript(key1, key2, key3);

	//sha256 the script
	data_chunk multisig_hash = to_chunk(sha256_hash(multisig.to_data(0)));

	//redeem script
	operation::list redeemscript_ops {operation(opcode(0)), operation(multisig_hash)};
	script redeem_script = script(redeemscript_ops);

	return redeem_script;
}

After those, we are going to write a function to get an ec_private object from a private key string.

ec_private stringToPrivate(std::string stringEC){
	ec_secret secret;
	decode_base16(secret, stringEC);
	return ec_private(secret, ec_private::testnet);
}

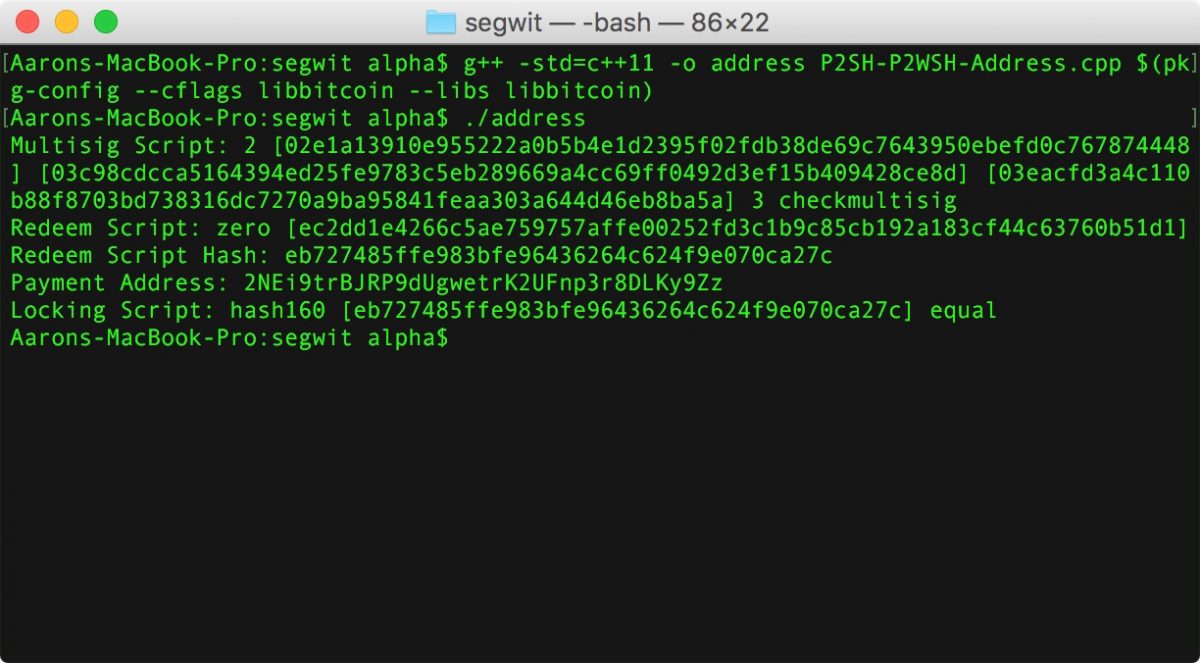
Now we can start to build our transaction in the main funciton. to start we will define three private keys, corresponding to the 3 public keys we generated for the multisig.

Then we get our multisig address by passing the 3 public keys to our getRedeemScript method inside of our payment address constructor.


int main() {

	ec_private key1 = stringToPrivate("e4ad55ecfd41062cec616762b73457c4d6bab35f3cb7dbe2fbab3f6a4d921bde");
	ec_private key2 = stringToPrivate("3edef3e2d2152156e6816c06e65f64baff4fc0831cf25ae86df016a5cb651747");
	ec_private key3 = stringToPrivate("5398432f87ad7b09d2aa6c3c2653d24a97b96fe1205d75f6d0dcf62b6c3414e1");

	payment_address fromAddress = payment_address(getRedeemScript(key1.to_public(), key2.to_public(), key3.to_public()), payment_address::testnet_p2sh);

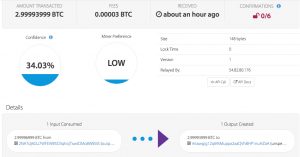
Now, we can build our transaction object and output for our reciever.

	transaction tx;
	tx.set_version(1u);
	 //make output
	payment_address toAddress = wallet::payment_address("2N8hwP1WmJrFF5QWABn38y63uYLhnJYJYTF");
	uint64_t amount;
	btc_to_satoshi(amount, "0.64999");
	script outScript = script(script::to_pay_script_hash_pattern(toAddress));
	tx.outputs().push_back(output(amount, outScript));

Once we have defined where our coins are going we can get our UTXOs and start building our input. For this we are going to need to save our UTXOs amount in order to properly sign the tx.


	//make input
	points_value UTXOs = getUTXOs(fromAddress, amount);
	uint64_t previous_amount = UTXOs.points[0].value();

	input workingInput = input();
	workingInput.set_previous_output(output_point(UTXOs.points[0]));
	workingInput.set_sequence(max_input_sequence);
	tx.inputs().push_back(workingInput);

Now, before we sign the tx we are going to need to use the witness script as the script code, so we create a script object using the getWitnessScript function.

//witness script
	script witness_script = getWitnessScript(key1.to_public(), key2.to_public(), key3.to_public());
//

Then we can sign the tx, just like a P2SH-P2WKH output.

	endorsement sig1;
	script().create_endorsement(sig1, key1.secret(), witness_script, tx, tx.inputs()[0].previous_output().index(), sighash_algorithm::all, script_version::zero, previous_amount);

But we need to do it again because we need signatures from at least 2 keys.

	endorsement sig2;
	script().create_endorsement(sig2, key2.secret(), witness_script, tx, tx.inputs()[0].previous_output().index(), sighash_algorithm::all, script_version::zero, previous_amount);

Now that we have both signatures, we need to create the input script, which is simply a push of the redeem script data.

	script redeem_script = getRedeemScript(key1.to_public(), key2.to_public(), key3.to_public());
	script inputScript = script(to_chunk(redeem_script.to_data(1)), 0);
	tx.inputs()[0].set_script(inputScript);

Finally we can create the witness by creating a stack of 0 (an empty datachunk because of the script multisig bug), the two signatures and the witness script data.
we can then set this as the witness.

	data_chunk zero;
	data_stack witness_data {zero, sig1, sig2, witness_script.to_data(0)};
	tx.inputs()[0].set_witness(witness(witness_data));

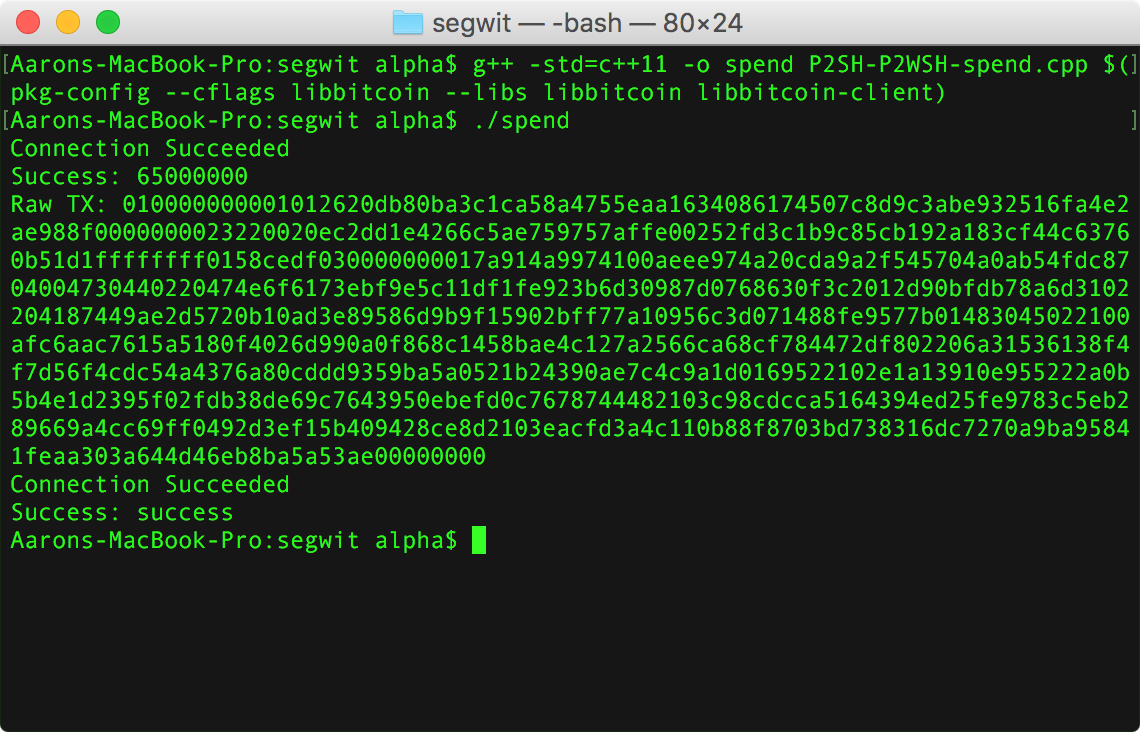
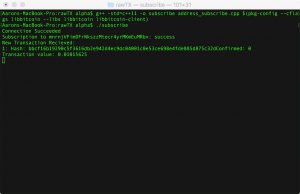
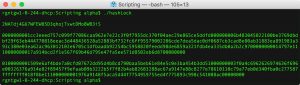
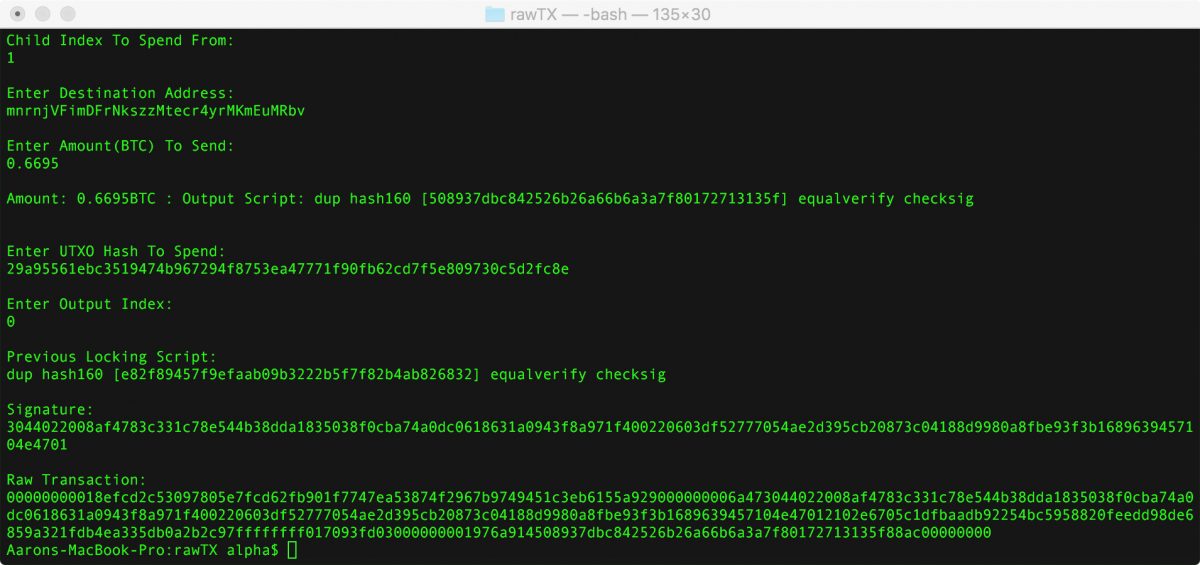
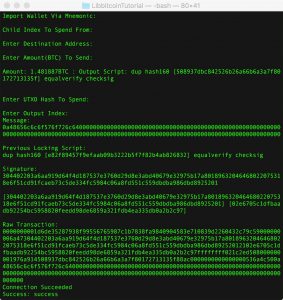
Once we have the full transaction, we can print it to the console and broadcast it to the network.

	std::cout << "Raw TX: " << encode_base16(tx.to_data(1, 1)) << std::endl;
	broadcastTX(tx);

Build and run with:

	//build
	$ g++ -std=c++11 -o spend P2SH-P2WSH-spend.cpp $(pkg-config --cflags libbitcoin --libs libbitcoin libbitcoin-client)
	$ ./spend

Full code on github.

segwit multisig libbitcoin

Libbitcoin: Create a Non-Native Segwit Multisig Address(P2SH-P2WSH)

Create a Non-Native Segwit Multisig Address

Creating a multisig address that is spendable via segwit and payable via non-segwit aware wallets is very similar to creating a standard non-native segwit address.

First, we need to create a standard multisig script for the witness script.

this script will then be hashed with sha256 and the resulting 34-byte script hash will be preceeded by the OP_0 to create the redeem script.

OP_0 [SHA256(witness_script)]

From here, it is treated like a standard P2SH. The HASH160 of the redeem script will be base58 encoded to create the payment address.

This program is going to generate a 2 of 3 multisig Non-Native segwit address.

First we are going to write a function which takes 3 keys and generates the multisig script.

#include <bitcoin/bitcoin.hpp>
#include <bitcoin/client.hpp>
#include <string.h>

using namespace bc;
using namespace bc::wallet;
using namespace bc::machine;
using namespace bc::chain;
script getWitnessScript(ec_public key1, ec_public key2, ec_public key3) {
	//make key list
	point_list keys {key1.point(), key2.point(), key3.point()};
	//create 2/3 multisig script
	script multisig = script::to_pay_multisig_pattern(2u, keys);
	return multisig;
}

Next we are going to need a function to create the redeem script. This function is going to hash the multisig script with a single SHA256 hash and then create an operations list of a OP_0 and the multiscript hash data and then create a script from those operations.

script getRedeemScript(ec_public key1, ec_public key2, ec_public key3) {
	//create 2/3 multisig script
	script multisig = getWitnessScript(key1, key2, key3);

	//sha256 the script
	data_chunk multisig_hash = to_chunk(sha256_hash(multisig.to_data(0)));

	//redeem script
	operation::list redeemscript_ops {operation(opcode(0)), operation(multisig_hash)};
	script redeem_script = script(redeemscript_ops);

	return redeem_script;
}

Now, we can start building our program in the main function. By first declaring our three public keys. I generated my via BX.

//Generated with bx seed | bx ec-new
//bx ec-to-public [privatekey]
//private keys
// 0: e4ad55ecfd41062cec616762b73457c4d6bab35f3cb7dbe2fbab3f6a4d921bde
// 1: 3edef3e2d2152156e6816c06e65f64baff4fc0831cf25ae86df016a5cb651747
// 2: 5398432f87ad7b09d2aa6c3c2653d24a97b96fe1205d75f6d0dcf62b6c3414e1
int main() {
	//Define 3 public keys to use
	ec_public key1("02e1a13910e955222a0b5b4e1d2395f02fdb38de69c7643950ebefd0c767874448");
	ec_public key2("03c98cdcca5164394ed25fe9783c5eb289669a4cc69ff0492d3ef15b409428ce8d");
	ec_public key3("03eacfd3a4c110b88f8703bd738316dc7270a9ba95841feaa303a644d46eb8ba5a");

}

Then we can use those keys to create the witness script and output it to the console.


	//create 2/3 multisig script
	script multisig = getWitnessScript(key1, key2, key3);
	std::cout << "Multisig Script: " << multisig.to_string(0) << std::endl;

Then we can do the same thing with the redeem script.

	//redeem script
	script redeem_script = getRedeemScript(key1, key2, key3); 
	std::cout << "Redeem Script: " << redeem_script.to_string(0) << std::endl;

Now, we can simply pass the redeem script to a payment_address constructor and specify the testnet to create our address which will be payable regardless of whether or not the payer is segwit aware.

We can then use this payment_address object to display the embedded script hash and base58 address on the console.

	//make address from script
	payment_address address = payment_address(redeem_script, payment_address::testnet_p2sh);

	std::cout << "Redeem Script Hash: " << encode_base16(address.hash()) << std::endl;
	std::cout << "Payment Address: " << address.encoded() << std::endl;

Further, we can create the scriptpubKey from the address hash and display it to the console.


	//scriptPubKey
	script P2SH_P2WSH = script(script::to_pay_script_hash_pattern(address.hash()));

	std::cout << "Locking Script: " << P2SH_P2WSH.to_string(0) << std::endl;

And as always, we can compile and run with:

$ g++ -std=c++11 -o address P2SH-P2WSH-Address.cpp $(pkg-config --cflags libbitcoin --libs libbitcoin)
$ ./address

As always, full code can be found on github.

Segwit multisig address

Libbitcoin: Spending a P2SH-P2WKH Segwit Output

Today I am going to go over how to spend a segwit output from a P2SH-P2WKH address of the type built here.

To follow along with this tutorial, you should first build a P2SH-P2WKH address, by following my previous tutorial, and then head over to a testnet faucet and have some coins sent to that address.

Once your address has received some testnet coins, these outputs will be segwit ready and we will be able to spend them with a segwit transaction taking advantage of the reduced fees.

#include <bitcoin/bitcoin.hpp>
#include <bitcoin/client.hpp>
#include <string.h>

using namespace bc;
using namespace bc::wallet;
using namespace bc::machine;
using namespace bc::chain;

The first thing we are going to do, after including the requisite libbitcoin libraries of course, is to add two function that interact with libbitcoin-client allowing us the connect to the network. These functions are the getUTXOs function along with the bradcastTX function and are described in detail elsewhere on this blog.

points_value getUTXOs(payment_address Addy, uint64_t amount)
{
	client::connection_type connection = {};
	connection.retries = 3;
	connection.timeout_seconds = 8;
	connection.server = config::endpoint("tcp://testnet1.libbitcoin.net:19091");
	client::obelisk_client client(connection);

	points_value val1;
	static const auto on_done = [&val1](const points_value& vals) {

		std::cout << "Success: " << vals.value() << std::endl;
		val1 = vals;
		

	};

	static const auto on_error = [](const code& ec) {

		std::cout << "Error Code: " << ec.message() << std::endl;

	};

	if(!client.connect(connection))
	{
		std::cout << "Fail" << std::endl;
	} else {
		std::cout << "Connection Succeeded" << std::endl;
	}

	client.blockchain_fetch_unspent_outputs(on_error, on_done, Addy, amount, select_outputs::algorithm::greedy);
	
	client.wait();
	
	
	//return allPoints;
	return val1;


}
void broadcastTX(transaction tx)
{
	client::connection_type connection = {};
	connection.retries = 3;
	connection.timeout_seconds = 8;
	connection.server = config::endpoint("tcp://testnet3.libbitcoin.net:19091");
	client::obelisk_client client(connection);

	if(!client.connect(connection))
	{
		std::cout << "Fail" << std::endl;
	} else {
		std::cout << "Connection Succeeded" << std::endl;
	}
	
	static const auto on_done = [](const code& ec) {

		std::cout << "Success: " << ec.message() << std::endl;

	};

	static const auto on_error2 = [](const code& ec) {

		std::cout << "Error Code: " << ec.message() << std::endl;

	};

	client.transaction_pool_broadcast(on_error2, on_done, tx);
	client.wait();
}

Once we have those, we are going to need to set up two helper functions. The first will simply take mnemonic as a string and convert it to and hd_private object so that we can access the necessary keys for our address.

hd_private getPrivateKey(std::string walletMnemonic) {
	std::string mnemonic = walletMnemonic;
	data_chunk seed = to_chunk(decode_mnemonic(split(mnemonic)));
	return hd_private(seed, hd_private::testnet);
}

Next, we will create a function that takes a compressed public key and returns a witness script program in the form of an operation list. The witness program its self is simply an OP_0 followed by a bitcoin short hash of the compressed public key. This can be implemented in libbitcoin like so:

operation::list witnessProgram(ec_compressed publicKey) {
	short_hash KeyHash = bitcoin_short_hash(publicKey);
	return {operation(opcode(0)), operation(to_chunk(KeyHash))};
}

No we can go to the main function and start building our transaction by first getting out private and public keys for our desired mnemonic.

int main() {

	hd_private privateKey = getPrivateKey("portion shop border uniform loan grab dismiss boss wild magnet strong supreme era swing else keep voyage forest");
	ec_compressed compressedPublicKey = privateKey.to_public().point();
}

Once we have our keys, we can wrap our witness program in a script object, take the short hash of the script and create a P2SH address from that. This will allow us to send our change back to the same address.

script P2WPKH = script(witnessProgram(compressedPublicKey));
short_hash WitnessProgramHash = bitcoin_short_hash(P2WPKH.to_data(0));
payment_address fromAddress = payment_address(P2WPKH, payment_address::testnet_p2sh);

Then we set up our transaction object and create our output as we usually would.

transaction tx;
tx.set_version(1u);
//Make Output
payment_address toAddress = wallet::payment_address("mnrnjVFimDFrNkszzMtecr4yrMKmEuMRbv");
uint64_t amount;
btc_to_satoshi(amount, "0.5");
tx.outputs().push_back(output(amount, script(script().to_pay_key_hash_pattern(toAddress.hash()))));

Once we have our output set up, we can get the utxos via our libbitcoin client function and then set up our change output.

Note: For this tutorial we are assuming that we are only using 1 UTXO, so if you are following along make sure that the amount you’re sending is small enough to only require 1 utxo from your address.

//Make Change
points_value UTXOs = getUTXOs(fromAddress, amount);
uint64_t change = UTXOs.value() - amount - 10000;
script outScript = script(script().to_pay_script_hash_pattern(fromAddress.hash()));
tx.outputs().push_back(output(change, outScript));

Now we can start building our input as usual, the only extra thing we will need to do is save the value of our UTXO as it is required to sign a witness sighash.

//Make Input
input workingInput = input();
workingInput.set_previous_output(output_point(UTXOs.points[0]));
workingInput.set_sequence(max_input_sequence);
tx.inputs().push_back(workingInput);
uint64_t previous_amount = UTXOs.points[0].value();

From here we are ready to create our signature, to do this according for a segwit transaction we are going to need to sign the usual components in addition to a script_code, script version, the index of the our utxo and the amount of the utxo.

The script code is simply a P2KH pattern script with our public key and the script version is 0.

The sig is implemented like this:

//Make Signature
script script_code = script::to_pay_key_hash_pattern(bitcoin_short_hash(compressedPublicKey));
endorsement sig;
script().create_endorsement(sig, privateKey.secret(), script_code, tx, tx.inputs()[0].previous_output().index(), sighash_algorithm::all,  script_version::zero, previous_amount);

Once the signature is generated we can set the witness data for our input, which is just a data stack of the signature followed by the compressed public key. This data is the portion of the transaction data that is discounted (in terms of fees) with segregated witness.

//Make Witness
data_stack witness_data {to_chunk(sig), to_chunk(compressedPublicKey)};
tx.inputs()[0].set_witness(witness(witness_data));

Finally we can set the input script with the P2WPKH script data.

//set input script
data_chunk scriptChunk = to_chunk(P2WPKH.to_data(1));
tx.inputs()[0].set_script(script(scriptChunk, false));

Now we will print out the serialized transaction data and broadcast the transaction to the network.

std::cout << encode_base16(tx.to_data(1, 1)) << std::endl;
broadcastTX(tx);

As usual we will build and run this on the command line with:

$ g++ -std=c++11 -o spend segwit_spend.cpp $(pkg-config --cflags libbitcoin --libs libbitcoin libbitcoin-client)
$ ./spend

Segwit_Spend_consoleJPG

As usual full code can be found at github.

Libbitcoin: Real Time Transaction Updates Using Subscribe_Address

Today I’m going to briefly go over a Libbitcoin example program. This tutorial will utilize libbitcoin-client’s subscribe_address function to watch for realtime updates on an addresses balance. As usual the example program will be written for the bitcoin testnet.

The first thing, as always, is to include the requisite libraries and namespaces.

#include <bitcoin/bitcoin.hpp>
#include <bitcoin/client.hpp>
#include <string.h>
#include <iostream>

using namespace bc;

Now, we will need to define a subscribe function, which will be void since we are not returning anything and takes the payment address we want to watch as an argument.

void subscribe(wallet::payment_address watch_address) {

}

Inside the subscribe function, we are going to use the connection_type object to define our client’s connection settings, including the testnet server endpoint we want to use. Then we are going to want to instantiate our obelisk client object.

void subscribe(wallet::payment_address watch_address) {

	client::connection_type connection = {};
	connection.retries = 3;
	connection.timeout_seconds = 8;
	connection.server = config::endpoint("tcp://testnet3.libbitcoin.net:19091");

	//instantiate obelisk client
	client::obelisk_client client(connection);

}

Once we have our connection established, we are going to need to implement 3 handlers for this function. First, we need to write an on_subscribed handler which will let us know that our subscription request succeeded. To do this we simply need to pass the watch_address variable and get the error code returned from our client call and output its associated message in our console output.

 	static const auto on_subscribed = [&watch_address](const code& ec) {
		std::cout << "Subscription to " << watch_address.encoded() <<": " << ec.message() << std::endl;
	};

Then, we need a second handler that will output any errors returned to our client.

	static const auto on_error = [](const code ec) {
		std::cout << "Error Code: " << ec.message() << std::endl;

	};

Now our third handler is going to be the on_update handler, this will be triggered every time we get an update about our address from our subscription.

For this, we simply need to get the transaction info returned to our client and output it to the console with an organized message. Each update should return an error code, a sequence number, the confirmed block height(0 if unconfirmed), and the hash of the transaction.

    auto on_update = [](const code& error,
        uint16_t sequence, size_t height, const hash_digest& tx_hash)
    {
    	std::cout << "New Transaction Recieved: " << std::endl;
	    std::cout << sequence <<": "<< "Hash: " << encode_hash(tx_hash) <<" Confirmed: "<< height << std::endl;
    };

Now, this handler will output the updates to the console, but is missing some vital information, such as the amount received in the transaction. For this, we are going to want to write another function, which looks up that information via the transaction hash we just received and displays the amount alongside this update.

So we are going to need to call another function, which we will write briefly, called getTXInfo. This new function is going to need some information like the connection settings and the address we are watching so we are going to pass those variables to the handler and then to our new function.

The on_update handler should look like this now:

    auto on_update = [&connection, &watch_address](const code& error,
        uint16_t sequence, size_t height, const hash_digest& tx_hash)
    {
    	std::cout << "New Transaction Recieved: " << std::endl;
	    std::cout << sequence <<": "<< "Hash: " << encode_hash(tx_hash) <<" Confirmed: "<< height << std::endl;
	    getTXInfo(connection, tx_hash, watch_address);
    };

Now, to finish up the subscribe function we just need to call some functions on our client object. First establishing a connection and setting our on_update handler like so:


if(!client.connect(connection))
{
std::cout << "Fail" << std::endl;
} else {
std::cout << "Connection Succeeded" << std::endl;
}

client.set_on_update(on_update);

then subscribing to our address and defining how many seconds we want to monitor the address for:

client.subscribe_address(on_error, on_subscribed, watch_address);
client.wait();
client.monitor(8000); //in seconds

All together, our subscribe function should look like this:

void subscribe(wallet::payment_address watch_address) {

	client::connection_type connection = {};
	connection.retries = 3;
	connection.timeout_seconds = 8;
	connection.server = config::endpoint("tcp://testnet3.libbitcoin.net:19091");
	//instantiate obelisk client
	client::obelisk_client client(connection);

	static const auto on_subscribed = [&watch_address](const code& ec) {
		std::cout << "Subscription to " << watch_address.encoded() <<": " << ec.message() << std::endl;
	};

	static const auto on_error = [](const code ec) {
		std::cout << "Error Code: " << ec.message() << std::endl;

	};

    auto on_update = [&connection, &watch_address](const code& error,
        uint16_t sequence, size_t height, const hash_digest& tx_hash)
    {
    	std::cout << "New Transaction Recieved: " << std::endl;
	    std::cout << sequence <<": "<< "Hash: " << encode_hash(tx_hash) <<" Confirmed: "<< height << std::endl;
	    getTXInfo(connection, tx_hash, watch_address);
    };

	if(!client.connect(connection))
	{
		std::cout << "Fail" << std::endl;
	} else {
		std::cout << "Connection Succeeded" << std::endl;
	}

	client.set_on_update(on_update);
	client.subscribe_address(on_error, on_subscribed, watch_address);
	client.wait();
	client.monitor(8000); //in seconds

}

Next, we need to implement the getTXInfo function to get the amount of the new output we received.

For this we are going to define another void function which takes the connection object, the transaction hash, and the payment address we are watching.

void getTXInfo(client::connection_type connection, const hash_digest tx_hash, wallet::payment_address watch_address) {

}

and again we want to instantiate a client object.


client::obelisk_client client(connection);

along with a simple error handler:

    auto on_error = [](const code& ec)
    {
    	std::cout << "Error Code: " << ec.message() << std::endl;
    };

Now, we are looking up a transaction object via the hash we just received from our update, so our on_done handler is going to need to take that transaction object and iterate through its outputs. For each output, we are going to want to extract the recipient address from the script(this is done using a special libbitcoin function included in the output object). Then we check the recipient address against our watch address and if they match we can print the value of that output to the console.


auto on_done = [&watch_address](const chain::transaction tx)
    {
    	for (chain::output out: tx.outputs())
    	{	
    		
    		if (wallet::payment_address(out.address().hash(), wallet::payment_address::testnet_p2kh) == watch_address)
    			std::cout << "Transaction value: "<< encode_base10(out.value(), 8) << std::endl;

    	}
    	   
    };

Note, that we need to convert the address to a testnet_p2kh format before checking against our watch address because the hash that is extracted from the script will initially be converted to a mainnet address.

Now that our handlers are done we can establish a connection to the client and call the fetch_transaction method like this:


if(!client.connect(connection))
{
		std::cout << "Fail" << std::endl;
	}
client.transaction_pool_fetch_transaction(on_error, on_done, tx_hash);
client.wait();


And the entire getTXInfo function should look like this:


void getTXInfo(client::connection_type connection, const hash_digest tx_hash, wallet::payment_address watch_address) {
	client::obelisk_client client(connection);

    auto on_done = [&watch_address](const chain::transaction tx)
    {
    	for (chain::output out: tx.outputs())
    	{	
    	
    		if (wallet::payment_address(out.address().hash(), wallet::payment_address::testnet_p2kh) == watch_address)
    			std::cout << "Transaction value: "<< encode_base10(out.value(), 8) << std::endl;

    	}
    	   
    };

    auto on_error = [](const code& ec)
    {
    	std::cout << "Error Code: " << ec.message() << std::endl;
    };

	if(!client.connect(connection))
	{
		std::cout << "Fail" << std::endl;
	}

    client.transaction_pool_fetch_transaction(on_error, on_done, tx_hash);
    client.wait();
}

Now, with both those function done we just need to call the subscribe function from main while passing the address we want to watch like this:


int main() {
	subscribe(wallet::payment_address("mnrnjVFimDFrNkszzMtecr4yrMKmEuMRbv"));
}

compile:


$ g++ -std=c++11 -o subscribe address_subscribe.cpp $(pkg-config --cflags libbitcoin --libs libbitcoin libbitcoin-client)

and run:


$ ./subscribe

The initial screen will show that you have successfully subscribed to the address, and then the console will hang until it gets an update or the monitoring time expires.

subscribe_initial(1)

If you jump over to https://testnet.manu.backend.hamburg/faucet you can request some testnet coins.

Subscribe_faucet(1)

Once they arrive, your program will notify you with a message showing the transaction hash and the amount received.

subscribe_console_update

As always, the code is on github

If you have any comments or tutorial requests please feel free to send them to me on twitter @alphajarm or by email aaron@jaramillo.xyz

Libbitcoin: Generating a Segwit Address

Saving money on bitcoin transaction fees with segregated witness first requires you to receive bitcoin in the form of segwit utxos. This post will go over a libbitcoin script for generating a testnet P2SH-P2WKH address to send your bitcoins to and have them ready for spending in segwit transactions.

In order to begin spending bitcoins via segregated witness transactions you need receive pay-to-witness-key-hash outputs. So, the first thing you need to create is a witness program that consist of a version number 0 and compressed hash of your public key.

One thing we need to be sure of is that we always use a compressed public key to generate a P2WKH address. So, first I define a function for getting the compressed public key from a mnemonic by decoding it to its seed and then calling the point getter to get the ec compressed public key.

ec_compressed getPublicKey() 
{
 std::string mnemonic = "portion shop border uniform loan grab dismiss boss wild magnet strong supreme era swing else keep voyage forest";
 data_chunk seed = to_chunk(decode_mnemonic(split(mnemonic)));
 hd_private privateKey = hd_private(seed, hd_private::testnet);
 ec_compressed compressedPublicKey = privateKey.to_public().point();
 return compressedPublicKey;
}

Then we need to define a function that will create a the P2WKH which simply looks like this:

0 [Compressed Public Key Hash]

To do this we need to create a bitcoin short hash of the compressed public key which we will pass as an argument. This short hash amounts to a RIPEMD160 hash of a SHA256 hash of the compressed public key point.  We then return this key hash as a data chunk in an operations list prefixed with an opcode 0 object.

operation::list witnessProgram(ec_compressed publicKey) 
{
 short_hash KeyHash = bitcoin_short_hash(publicKey);
 return {operation(opcode(0)), operation(to_chunk(KeyHash))};
}

Now we can create a script object for our witness program and print it out to the console.

int main()
{
//Output Compressed Public Key
 std::cout << "Public Key: "<< encode_base16(getPublicKey()) << std::endl;
//Output Witness Program
 script P2WPKH = script(witnessProgram(getPublicKey()));
 std::cout << "Witness Program: " << P2WPKH.to_string(0) << std::endl;
}
 

Now in order to make these P2WPKH outputs payable by anyone regardless of their segwit awareness, we need to wrap them in a P2SH address. To do this we first save a short hash of the witness program and pass it to a P2SH script pattern factory.

int main()
{
 //Output Compressed Public Key
 std::cout << "Public Key: "<< encode_base16(getPublicKey()) << std::endl;
 //Output Witness Program
 script P2WPKH = script(witnessProgram(getPublicKey()));
 std::cout << "Witness Program: " << P2WPKH.to_string(0) << std::endl;

 //Create P2SH script
 short_hash WitnessProgramHash = bitcoin_short_hash(P2WPKH.to_data(0));
 script P2SH_P2WPKH = script::to_pay_script_hash_pattern(WitnessProgramHash); 
} 

Then we can print out the P2SH_P2WPKH script pubkey as a string to the console.

We can also print the payment address by passing the witness program script to the payment address object and calling the encoded accessor.

int main()
{
 //Output Compressed Public Key
 std::cout << "Public Key: "<< encode_base16(getPublicKey()) << std::endl;
 //Output Witness Program
 script P2WPKH = script(witnessProgram(getPublicKey()));
 std::cout << "Witness Program: " << P2WPKH.to_string(0) << std::endl;

 //Create P2SH script
 short_hash WitnessProgramHash = bitcoin_short_hash(P2WPKH.to_data(0));
 script P2SH_P2WPKH = script::to_pay_script_hash_pattern(WitnessProgramHash);

 //Print our P2SH script and address
 std::cout <<"P2SH Script: " <<P2SH_P2WPKH.to_string(0) << std::endl;
 std::cout << "Payment Address: " <<payment_address(P2WPKH, payment_address::testnet_p2sh).encoded() << std::endl;
} 

As usual this program can be compiled and run via the Command line:

$ g++ -std=c++11 -o segwit segwit.cpp $(pkg-config --cflags libbitcoin --libs libbitcoin)
$ ./segwit

You’ll note that the payment address begins with a 2, this denotes a testnet Pay-To-Script-Hash address since segwit address can be paid to the same as P2SH. A mainnet segwit address with start with a 3.

Segwit_Address_Output

Any testnet coins sent to this address will be ready to spend with a fee-discounted segwit transaction.

Libbitcoin: Cross-Chain Swaps With HTLCs

Cross-Chain Trades

Cross-Chain Atomic Swaps are trustless on-chain cryptocurrency trades enabled using advanced scripting features like hashed timeLock contracts(HTLC). Like hashlock contracts discussed here, HTLCs use a secret pre-image and hash to arbitrate a contract but include a timelock on the portion of the contract which allows the funds to be refunded by a private key.

Say Alice wants to trade Bob 1 tBTC for 10 tLTC:

Alice would create a contract script like this:

OP_IF OP_DUP OP_HASH160 [BOB PUBKEYHASH] OP_EQUALVERIFY OP_CHECKSIGVERIFY OP_HASH160 [HASH SECRET] OP_EQUAL OP_ELSE [nLocktime] OP_CHECKLOCKTIMEVERIFY OP_DROP OP_DUP OP_HASH160 [Alice PUBKEYHASH] OP_EQUALVERIFY OP_CHECKSIG

This script says:

“The money in this contract can be spent by Bob’s private key and the Secret Hash’s pre-image or can be spent after N time by Alice’s private key.”

Bob would then create a litecoin transaction script for his side of the contract.

OP_IF OP_DUP OP_HASH160 [ALICE PUBKEYHASH] OP_EQUALVERIFY OP_CHECKSIGVERIFY OP_HASH160 [HASH SECRET] OP_EQUAL OP_ELSE [n/2 Locktime] OP_CHECKLOCKTIMEVERIFY OP_DROP OP_DUP OP_HASH160 [BOB PUBKEYHASH] OP_EQUALVERIFY OP_CHECKSIG

Both of these contracts lock the coins sent to them with the hash but allow for the funds to be refunded after a certain locktime. Note, the litecoin lock time is half as much as the bitcoin locktime, this is to prevent Alice from trying to create a race condition by claiming the ltc coins and attempting to also claim the refund.

These scripts can then be hashed to addresses.

Alice then pays her 1tBTC to the contract’s address while Bob pays 10 tLTC to the LTC contract’s address.

Now, Alice can claim the 10 tLTC from the litecoin blockchain by revealing the hash pre-image in the unlocking script of the withdraw transaction.

Bob, can see the revealed pre-image and use it to redeem his 1tBTC from the other contract before the locktime runs out.

At any point in this transaction, if one side doesn’t hold up their end of the bargain the other side can simply refund their money with at worst a loss in time value.

Each party in the swap will need to:
• create a contract script
• send a transaction to the contract
• create a transaction redeeming coins on the other chain

First, we are going to need some function to create the special contract script. This is going to be done similarly to how complex scripts were made in my hashLock and multisig script write-ups. The variable data in the contract script are: the two pubkey hashes, the hashlock and the lock time. These values are going to be passed to the contract function and it’s going to return a script object containing a HTLC.

script contractScript(payment_address seller, payment_address buyer, uint32_t locktime, short_hash hashLock)
{
	std::string scriptString = "if dup hash160 [" + encode_base16(buyer.hash()) + "] equalverify checksigverify hash160 [" + encode_base16(hashLock) + "] equal else [" + encode_base10(locktime) + "] checklocktimeverify drop dup hash160 [" + encode_base16(seller.hash()) + "] equalverify checksig";
	script contract = script();
	contract.from_string(scriptString);
	return contract;
}

For this contract factory, we can use the libbitcoin abstract data types for payment addresses but will need a way to set the locktime and hashlock.

The locktime can be represented as a block height or a Unix timestamp. For simplicity I’ve decided to use Unix time. This function will take an argument N, where n represents days locked, and multiply it by 86400(the number of seconds per day) and then add it to the current Unix time thus returning the uint32_t timestamp of N days in the future.

uint32_t setLocktime(uint32_t days)
{
	uint32_t seconds = days*86400;
	uint32_t now = std::chrono::duration_cast<std::chrono::seconds>(std::chrono::system_clock::now().time_since_epoch()).count();
	uint32_t timeLock = now + seconds;
	return timeLock;
}

Now, recall that the contract script is checking the hashlock by hash160ing an argument. Our hashLock function is going to take a string, the password/preimage, and convert it to a data chunk before returning a bitcoin short hash(same as hash160, same as ripemd160(sha256(data))).

short_hash makeHashLock(std::string secret)
{
	data_chunk secretChunk = to_chunk(secret);
	short_hash hashLock = bitcoin_short_hash(secretChunk);
	return hashLock;
}

With those two helper functions, the contract factory should now work. We can test this from the main function.

int main(){
	payment_address aliceBTC_address("mpEwnuvRJxRC7R4KxjdooMFRUNRYaQxwWD");
	payment_address bobBTC_address("moRFyt8S8YTCJkgHktoqVZ73zWb8crevh2");
	script BTCcontract = contractScript(aliceBTC_address, bobBTC_address, setLocktime(14), makeHashLock("Libbitcoin"));
	payment_address BTCcontract_address = payment_address(BTCcontract, 196);

	std::cout << "BTC contract Address: " << BTCcontract_address.encoded() << std::endl;
	std::cout << "HashLock: " << encode_base16(makeHashLock("Libbitcoin")) << "\n" <<std::endl;
std::cout << "Contract Script: " << encode_base16(BTCcontract.to_data(0)) << std::endl;

This script can be inspected using BX:

alpha$ bx script-decode 

Now, our traders need a way to send the amount of coin they want to exchange to the contract address. This is achieved by constructing a standard p2sh transaction from our public key, to do so we need to pass our transaction-building function the payment address of the contract, the amount we want to send, and the private key to sign with. Now, inside our pay-to-contract function we can set the inputs from our address, outputs to the contract and sign it using another helper function to push the sig script into the transaction.

transaction payToContract(payment_address contract, uint64_t amount, ec_private key)
{
	transaction tx = transaction();
	hash_digest utxoHash; 
	decode_hash(utxoHash, "0e600c5a7ee3055dee38b08379a020fa5eb013bdffe8742fb9f0a802e7011d50");
	output_point utxo(utxoHash, 0);
	input input1 = input();
	input1.set_previous_output(utxo);
	input1.set_script(script(script().to_pay_key_hash_pattern(key.to_payment_address())));
	tx.inputs().push_back(input1);

	script outputScript(script().to_pay_script_hash_pattern(contract.hash()));
	output output1(amount, outputScript);
	tx.outputs().push_back(output1);

	return sigScript(key, tx);

}

transaction sigScript(ec_private wal, transaction tx)
{
	int index = 0;
	for (auto input: tx.inputs())
	{

		endorsement sig;
		script().create_endorsement(sig, wal.secret(), input.script(), tx, index, all);
		operation::list ops {operation(sig), operation(to_chunk(wal.to_public().point()))};
		script scriptSig(ops);
		input.script().clear();
		input.set_script(scriptSig);
		tx.inputs()[index] = input;
		index++;
	}
	return tx;

}

Again, we can test our transaction builder from the main function.

int main(){
	payment_address aliceBTC_address("mpEwnuvRJxRC7R4KxjdooMFRUNRYaQxwWD");
	payment_address bobBTC_address("moRFyt8S8YTCJkgHktoqVZ73zWb8crevh2");
	script BTCcontract = contractScript(aliceBTC_address, bobBTC_address, setLocktime(14), makeHashLock("Libbitcoin"));
	payment_address BTCcontract_address = payment_address(BTCcontract, 196);

	std::cout << "BTC contract Address: " << BTCcontract_address.encoded() << std::endl;
	std::cout << "HashLock: " << encode_base16(makeHashLock("Libbitcoin")) << "\n" <<std::endl;
std::cout << "Contract Script: " << encode_base16(BTCcontract.to_data(0)) << std::endl;
	transaction BTCpayment = payToContract(BTCcontract_address, 100000000, alicBTC_private);
	std::cout << encode_base16(BTCpayment.to_data(1)) << "\n" << std::endl;
	ec_private alicBTC_private("cR3FqqoLz6b5wmA5h7LHzTJYosbcuZGsrQ2Fse8V2q2jQtesarmg", 239);

Now, the first two major functionalities of the swap are implemented and we only require a method withdrawing money from the contract once the terms have been met but in order to do so we will need some participation from the other side of this exchange.

We can test the LTC side of this transaction in the main function, note that that the only difference here is that the address prefixes will are passed through manually and will be different depending on the chain used.

For this cross-testnet example; however, P2SH-address and private-key prefixes are the same for both coins.

int main(){
	payment_address aliceBTC_address("mpEwnuvRJxRC7R4KxjdooMFRUNRYaQxwWD");
	payment_address bobBTC_address("moRFyt8S8YTCJkgHktoqVZ73zWb8crevh2");
	script BTCcontract = contractScript(aliceBTC_address, bobBTC_address, setLocktime(14), makeHashLock("Libbitcoin"));
	payment_address BTCcontract_address = payment_address(BTCcontract, 196);

	std::cout << "BTC contract Address: " << BTCcontract_address.encoded() << std::endl;
	std::cout << "HashLock: " << encode_base16(makeHashLock("Libbitcoin")) << "\n" <<std::endl;
std::cout << "Contract Script: " << encode_base16(BTCcontract.to_data(0)) << std::endl;

	transaction BTCpayment = payToContract(BTCcontract_address, 100000000, alicBTC_private);
	std::cout << encode_base16(BTCpayment.to_data(1)) << "\n" << std::endl;
	ec_private alicBTC_private("cR3FqqoLz6b5wmA5h7LHzTJYosbcuZGsrQ2Fse8V2q2jQtesarmg", 239);

short_hash hashLock;
	decode_base16(hashLock, "7e88c8277e78610110c79a77eb0d340fba0c2775");
	script LTCcontract = contractScript(bobBTC_address, aliceBTC_address, setLocktime(7), hashLock);
	payment_address LTCcontract_address = payment_address(LTCcontract, 196);
	std::cout << "LTC contract Address: " << LTCcontract_address.encoded() << "\n"<<std::endl;
	transaction LTCpayment = payToContract(LTCcontract_address, 1000000000, bobLTC_private);
	std::cout << encode_base16(LTCpayment.to_data(1)) << "\n" <<std::endl;

Now that both parties have committed their coins to the exchange, Alice can claim her tLTC from the LTC contract. Once, to do this her sig script will have to include the secret pre-image, then Bob will be able to use it to create his withdraw transaction.

The withdraw transaction is going to sign the UTXO of the contract payment to the owner’s public key and will of course need to provide the Hash in order to do this. The script will need to start with the redeem script followed by opcode 81, which pushes the value 1 (aka TRUE) onto the stack telling the redeem script to execute the first if block.


transaction withdrawContract(transaction contractPayment, script redeemScript, uint64_t amount, data_chunk hashKey, ec_private key)
{
	transaction tx = transaction();
	// hash_digest utxoHash;
	// decode_hash(utxoHash, "");
	output_point utxo(contractPayment.hash(), 0);

	input input1 = input();
	input1.set_previous_output(utxo);
	tx.inputs().push_back(input1);

	script outputScript(script().to_pay_key_hash_pattern(key.to_payment_address().hash()));
	output output1(amount, outputScript);
	tx.outputs().push_back(output1);

	endorsement sig; 
	script().create_endorsement(sig, key.secret(), redeemScript, tx, 0, all);
	operation::list resolveHTLC {operation(hashKey), operation(sig), operation(to_chunk(key.to_public().point())), operation(opcode(81)), operation(redeemScript.to_data(0))};

	tx.inputs()[0].set_script(script(resolveHTLC));

	return tx;
}

Outputting Alice’s transaction in main():

int main(){
	payment_address aliceBTC_address("mpEwnuvRJxRC7R4KxjdooMFRUNRYaQxwWD");
	payment_address bobBTC_address("moRFyt8S8YTCJkgHktoqVZ73zWb8crevh2");
	script BTCcontract = contractScript(aliceBTC_address, bobBTC_address, setLocktime(14), 
         makeHashLock("Libbitcoin"));
	payment_address BTCcontract_address = payment_address(BTCcontract, 196);

	std::cout << "BTC contract Address: " << BTCcontract_address.encoded() << std::endl;
	std::cout << "HashLock: " << encode_base16(makeHashLock("Libbitcoin")) << "\n" <<std::endl;
        std::cout << "Contract Script: " << encode_base16(BTCcontract.to_data(0)) << std::endl;

	transaction BTCpayment = payToContract(BTCcontract_address, 100000000, alicBTC_private);
	std::cout << encode_base16(BTCpayment.to_data(1)) << "\n" << std::endl;
	ec_private alicBTC_private("cR3FqqoLz6b5wmA5h7LHzTJYosbcuZGsrQ2Fse8V2q2jQtesarmg", 239);
        short_hash hashLock;
	decode_base16(hashLock, "7e88c8277e78610110c79a77eb0d340fba0c2775");
	script LTCcontract = contractScript(bobBTC_address, aliceBTC_address, setLocktime(7), hashLock);
	payment_address LTCcontract_address = payment_address(LTCcontract, 196);
	std::cout << "LTC contract Address: " << LTCcontract_address.encoded() << "\n"<<std::endl;
	transaction LTCpayment = payToContract(LTCcontract_address, 1000000000, bobLTC_private);
	std::cout << encode_base16(LTCpayment.to_data(1)) << "\n" <<std::endl;


    std::cout << encode_base16(withdrawContract(LTCpayment, LTCcontract, 1000000000, to_chunk("Libbitcoin"), alicBTC_private).to_data(1)) << "\n" << std::endl;

    std::cout << encode_base16(withdrawContract(BTCpayment, BTCcontract, 100000000, to_chunk("Libbitcoin"), bobLTC_private).to_data(1)) << std::endl;

}

If for some reason Alice refused to communicate the password to Bob but still claimed the LTC funds, Bob can simply look on the blockchain and see the password in the unlocking script.

If Alice refuses to claim the LTC, then Bob just needs to wait until the locktime to claim his refund.

Libbitcoin: Hash Lock Contracts

Hash Lock Contracts:

Hash lock contracts allow bitcoin to be spent to a contract which locks them up, requiring the spender to produce some data that resolves the contracts hash function.

The contract is represented as a bitcoin address, subjecting any funds spent to it to the contracts hash condition. Basically, It’s another type of password you can add to a bitcoin transaction other than a private key signature.

These types of bitcoin scripting features allow for more complex trustless transaction models for smart contracts, arbitration, or cross-chain trading.

The hash-lock contract will look like this:

OP_IF OP_DUP OP_HASH160 [e82f89457f9efaab09b3222b5f7f82b4ab826832] OP_EQUALVERIFY OP_CHECKSIG OP_ELSE OP_HASH160 [7e88c8277e78610110c79a77eb0d340fba0c2775] OP_EQUAL

Basically, this script has two parts separated by the OP_IF and OP_ELSE statements. The first IF is a typical pay-to-key-hash-pattern which says that this output can be spent only if the spender provides a public key which when hash160-ed(sha256 followed by ripemd160 hash) equals the address and a signature which signs the transaction with the corresponding private key. The ELSE clause says that this output can also be spent if the spender is able to provides some pre-image which when hash160ed equals the hash in the script.

This script represents a contract that says:

“This money can be spent by anyone who controls address n2ge1S4bLDvJKx8AGXrK5JHY2D5cReVytu or anyone who can provide the secret data which hashes to 7e88c8277e78610110c79a77eb0d340fba0c2775.” 

In order to make this contract payable, we must turn it into a pay-to-script-hash address. Easy enough, using the same process used to create P2SH multisig addresses. The entire script is serialized and then hash160ed which, again, is just a sha256 hash followed by a ripemd160 hash. This produces a 20-byte hash of the contract, for example:

bcd2f1e567f69b46d795e47fa5ee571d8502eb6d

This hash can then be base58check-encoded to create an address for the contract. Note, mainnet P2SH addresses start with a 3 while testnet P2SH addresses start with a 2. which should look something like this:

2NATdj4GU7WFEW85D3qhojTxwtDMo8WB3iS

Now all the coin sent to this address will be subject to the terms of the contract that it is derived from.

Coding The Contract:

Making this contract in libbitcoin is going to be very similar to how we made and spent from a multsig address.


#include <bitcoin/bitcoin.hpp>
#include <bitcoin/client.hpp>
#include "HD_WalletTESTNET.cpp"


using namespace bc;
using namespace bc::wallet;
using namespace bc::machine;
using namespace bc::chain;


 First, I’ll need to include the relevant namespaces from libbitcoin including chain, machine and wallet. I’ll also want to include my HD_wallet utility that I built here.

The basic steps from here are going to look a lot like my raw transaction tutorial except with a more complex script. So, in the main function I’ll start building my transaction and input with a hard coded hash value.

int main()
{
	transaction hashLock = transaction();
	
	hash_digest utxoHash;
	decode_hash(utxoHash, "fddde55c869ec2ae040f37dc55790f3f2ce2e762a9ca8670f799c057d7ee3ecc");
	input input1 = input();
	input1.set_previous_output(output_point(utxoHash, 0));

}

Once I have the input set up, I can move on to the contract’s script which I can build using the script class’ from_string method. This way I can write out the script using mnemonics, note that the OP_ prefix can be left out and raw data must be placed in brackets.

int main()
{
	script redeemScript = script();
	redeemScript.from_string("if dup hash160 [e82f89457f9efaab09b3222b5f7f82b4ab826832] equalverify checksig else hash160 [7e88c8277e78610110c79a77eb0d340fba0c2775] equal");

}

We can now create an address from the contract by passing the script and “0xC4” the testnet p2sh version prefix to the payment address constructor. We can than output it to the console.

	payment_address contractAddress(redeemScript, 0xC4);
	std::cout << "\n" << contractAddress.encoded() << '\n' <<std::endl;

Now if we run this program we can see the address of our contract, the address we want to pay into in order to lock up the bitcoins under those terms. We can now construct our output by creating a pay-to-script-hash-pattern script and passing it our contracts hash. Then we just add our payment value to the output and push both the output and input to the transaction.

	script lockingScript = script(script().to_pay_script_hash_pattern(contractAddress.hash());
	output output1(299996999, lockingScript);
	hashLock.inputs().push_back(input1);
	hashLock.outputs().push_back(output1);

Once the transaction is built we just need to sign it and add the signature script. Here, I’m using an my HD_Wallet utility to derived my wallet from a mnemonic. Then we can output the raw transaction to the display.

	HD_Wallet wallet(split("chase your scorpion slab mnemonic imitate goes blouse here dignity message strong")); 
	endorsement sig;
	script().create_endorsement(sig, wallet.childPrivateKey(1).secret(), script(script().to_pay_key_hash_pattern(wallet.childAddress(1).hash())), hashLock, 0, all);
	operation::list ops = {operation(sig), operation(to_chunk(wallet.childPublicKey(1).point()))};
	hashLock.inputs()[0].set_script(script(ops));
	std::cout << encode_base16(hashLock.to_data(1)) << std::endl;

Now, to “withdraw” money from this address we are going to need to create a transaction spending money to our address and resolve the contract script. This concept can be resolved and spent either with the private key or the pre-image of the hash I added to the script.

So with the current agreement I have, the coins with in the address can be spent by myself at any time since I control the address n2ge1S4bLDvJKx8AGXrK5JHY2D5cReVytu. Now say I have revealed the pre-image based on some pre-arranged deal. You now know that secret pre-image is “Libbitcoin” which base16-encoded is 4c6962626974636f696e.

A transaction can now be constructed to withdraw the funds without a private key using the pre-image of the hash lock. Our unlocking script will have to bypass the first IF statement since we want to resolve the hashLock not the signature. To do this we simply pass OP_0 in front of our script causing the IF to evaluate false and pass control to the ELSE block. If we wanted to execute the IF block we would have to pass OP_1. Our unlocking script will look like this:

[Hash] + FALSE + [Redeem Script]

[4c6962626974636f696e] OP_0 [6376a914e82f89457f9efaab09b3222b5f7f82b4ab82683288ac67a9147e88c8277e78610110c79a77eb0d340fba0c277587]

Built into our withdraw transaction script:


transaction resolveContract(transaction contract, script redeemScript)
{
        //Address to withdraw money to
	payment_address withdrawAddress("mtawgig12q69tMuppx2xaQVhBHP1nuHZaA");
	transaction spendContract = transaction();

	output_point contractUTXO(contract.hash(), 0);
	//Secret pre-image
	data_chunk preImage;
	decode_base16(preImage, "4c6962626974636f696e");
        //The data that resolves the contract is pushed first, then the serialized contract script is included
        // this resolves the P2SH format
	script unlockingScript({operation(preImage), operation(opcode(0)), operation(redeemScript.to_data(0))});


	input input1(contractUTXO, unlockingScript, 0xffffffff);

	script lockingScript(script().to_pay_key_hash_pattern(withdrawAddress.hash()));
	output output2 = output(299993999, lockingScript);

	spendContract.inputs().push_back(input1);
	spendContract.outputs().push_back(output2);

	return spendContract;
}


This function can now be called from main and the resulting transaction can be displayed.

	std::cout << "\n" << encode_base16(resolveContract(hashLock).to_data(1)) << std::endl;

So, broadcasting the first transaction should send bitcoins to the contract’s address while the second transaction unlocks them with the hash pre-image and sends them to a withdraw address.

These conditional and complex scripting operations can be combined in various different ways with other scripting features like: checklocktime, checksequence and checkmultisig to create complex contracts and relationships like atomic swapping, zero-knowledge proof and multi-party arbitration.

console output:

hashLock

With the raw transaction you can broadcast them to the network on the browser through blockcypher, the command line using libbitcoin-explorer or using a libbitcoin-client function in the code.

Contract deposit transaction.contractTransaction

Withdraw from the contract.

resolveHash

As always full code can be found on github.

Libbitcoin: Annonymizing Bitcoin with a CoinJoin Transaction

One way of anonymizing bitcoin transactions is by using coinjoin. Coinjoin is a type of transaction that combines inputs from many different people’s wallets and creates outputs paying to several different pubkeys which, from the perspective of a blockchain observer, cannot be tied to an individual input from the set of inputs.

A 3-way coinjoin, would have you all combine UTXOs and pubkey hashes to construct a single transaction. After that you can individually sign the transaction and broadcast it to the network.

Coding a coinjoin transaction is a lot like coding a regular transaction except that it has multiple very specific inputs and outputs. For this walk through I have demoed a coinjoin transaction on the testnet. A lot of the necessary code is going to look similar to code used when building a raw transaction.

First include and namespace libbitcoin:


#include <bitcoin/bitcoin.hpp>
#include <bitcoin/client.hpp>


using namespace bc;
using namespace bc::wallet;
using namespace bc::machine;
using namespace bc::chain;


First, we can make the outputs by combining the three pubkeys and amounts.

output::list makeOuputs(uint64_t amount, payment_address address1, payment_address address2, payment_address address3)
{
	output output1(amount, script(script().to_pay_key_hash_pattern(address1.hash())));
	output output2(amount, script(script().to_pay_key_hash_pattern(address2.hash())));
	output output3(amount, script(script().to_pay_key_hash_pattern(address3.hash())));

	return output::list {output1, output2, output3};

}

Then, construct the transaction in the main function.

int main()
{
	payment_address destination1("n2ge1S4bLDvJKx8AGXrK5JHY2D5cReVytu");
	payment_address destination2("mnrnjVFimDFrNkszzMtecr4yrMKmEuMRbv");
	payment_address destination3("n2BPFTRKLtM6VQGN6tCWCaEbBuFTEo5P6r");

	transaction coinJoin = transaction();

	uint64_t amount = 100000000;
	output::list outputs = makeOuputs(amount, destination1, destination2, destination3);
	coinJoin.set_outputs(outputs);

Now, making the inputs is going to require connecting to a server. In order to get the UTXO by the sender’s address, we need to write a libbitcoin-server query function. Here we can use asynchronous callback functions to return a list of utxo points at least as large as the amount we queried from the server. .

points_value getUTXOs(payment_address Addy, uint64_t amount)
{
	client::connection_type connection = {};
	connection.retries = 3;
	connection.timeout_seconds = 8;
	connection.server = config::endpoint("tcp://testnet1.libbitcoin.net:19091");
	client::obelisk_client client(connection);

	points_value val1;
	static const auto on_done = [&val1](const points_value& vals) {

		std::cout << "Success: " << vals.value() << std::endl;
		val1 = vals;
		

	};

	static const auto on_error = [](const code& ec) {

		std::cout << "Error Code: " << ec.message() << std::endl;

	};

	if(!client.connect(connection))
	{
		std::cout << "Fail" << std::endl;
	} else {
		std::cout << "Connection Succeeded" << std::endl;
	}

	client.blockchain_fetch_unspent_outputs(on_error, on_done, Addy, amount, select_outputs::algorithm::greedy);
	
	client.wait();
	
	
	//return allPoints;
	return val1;


}

Once we have a way to get UTXOs we can construct the inputs with just a pubkey hash, AKA an address, and the amount we want to join. Note that we’re also going to add an extra output for the change from the transaction, which will not be anonymized.

transaction makeInput(payment_address Addy, transaction tx, uint64_t amount)
{
	points_value UTXOs = getUTXOs(Addy, amount);
	input::list inputs {};
	
	for (auto utxo: UTXOs.points)
	{
		input workingInput = input();
		workingInput.set_previous_output(output_point(utxo));

		std::cout << encode_base16(utxo.hash()) << std::endl;
		workingInput.set_script(script(script().to_pay_key_hash_pattern(Addy.hash())));
		workingInput.set_sequence(0xffffffff);
		inputs.push_back(workingInput);
	}

	uint64_t change = UTXOs.value() - amount - 1000;
	script outScript = script(script().to_pay_key_hash_pattern(Addy.hash()));

	std::cout << "change: "<< change << std::endl;
	tx.outputs().push_back(output(change, outScript));
	
	extend_data(tx.inputs(), inputs);
	return tx;
}

Now, back in the main function we can call this makeInput function for the first wallet, but we are going to want to have a function to sign it with first.

The signing function takes an ec private key and the coinjoin transaction and loops through the inputs looking for inputs with previous output scripts that match the script derived from private key.(the if statement). If the scripts match, we sign that input with a sighash all-anyone can pay pattern which allows others to add inputs. Then, the derived public key is combined with the signature and added to the input structure.


transaction sigScript(ec_private wal, transaction tx)
{
	int index = 0;
	for (auto input: tx.inputs())
	{
		if(input.script() == script(script().to_pay_key_hash_pattern(wal.to_payment_address().hash())))
		{
			endorsement sig;
			script().create_endorsement(sig, wal.secret(), input.script(), tx, index, all_anyone_can_pay);
			operation::list ops {operation(sig), operation(to_chunk(wal.to_public().point()))};
			script scriptSig(ops);
			input.script().clear();
			input.set_script(scriptSig);
			tx.inputs()[index] = input;
		}
		index++;
	}
	return tx;

}

Now, normally each participant would sign their portion of the transaction separately and thus protect their private keys. However, for this example, I am going to declare all three private keys at the top of the main function and call the inputs and signing utilities.

	ec_private wal1(bitcoin_hash(decode_mnemonic(split("ENTER YOUR MNEMONIC "))),0xEF6F, 1);
	ec_private wal2(bitcoin_hash(decode_mnemonic(split("ENTER YOUR MNEMONIC "))),0xEF6F, 1);
	ec_private wal3(bitcoin_hash(decode_mnemonic(split("ENTER YOUR MNEMONIC"))),0xEF6F, 1);


Now call the signing functions for each wallet and print out the resulting raw transaction.


	coinJoin = makeInput(wal1.to_payment_address(), coinJoin, amount);
	coinJoin = makeInput(wal2.to_payment_address(), coinJoin, amount);
	coinJoin = makeInput(wal3.to_payment_address(), coinJoin, amount);

	coinJoin = sigScript(wal1, coinJoin);
    coinJoin = sigScript(wal2, coinJoin);
	coinJoin = sigScript(wal3, coinJoin);
	std::cout << “\n” << encode_base16(coinJoin.to_data(1)) << std::endl;
	

Then, using the same broadcastTX function we learned how to code in my broadcasting a transaction post, we can submit this transaction to the network.

void broadcastTX(transaction tx)
{
	client::connection_type connection = {};
	connection.retries = 3;
	connection.timeout_seconds = 8;
	connection.server = config::endpoint("tcp://testnet1.libbitcoin.net:19091");
	client::obelisk_client client(connection);

	if(!client.connect(connection))
	{
		std::cout << "Fail" << std::endl;
	} else {
		std::cout << "Connection Succeeded" << std::endl;
	}
	
	static const auto on_done = [](const code& ec) {

		std::cout << "Success: " << ec.message() << std::endl;

	};

	static const auto on_error2 = [](const code& ec) {

		std::cout << "Error Code: " << ec.message() << std::endl;

	};

	client.transaction_pool_broadcast(on_error2, on_done, tx);
	client.wait();
}

And in the main function we add a call to this new function.

broadcastTX(coinJoin);

Compile with libbitcoin:

alpha$ g++ -std=c++11 -o join coinjoin.cpp $(pkg-config --cflags libbitcoin --libs libbitcoin libbitcoin-client)
alpha$ ./join

The output should look like this:
coinjoinOutput

Inspecting the transaction on a blockchain explorer illustrates how this method obfuscates bitcoin transactions. An observer of the transaction, who has tied my bitcoin address to my identity can see after the coinjoin transaction that I have sent 1 bitcoin away from my address but since it was combined with transactions from other addresses all with 1 bitcoin sent to a separate address, the observer has no way of knowing which of the three addresses I sent my coins to.

coinjoinExplorer

The observer can only infer that any of those three outputs has a 1/3 probability of being mine. To achieve greater anonymity, coins can be joined several time over with many many participants. An ideal coinjoining technique would minimize the amount of trust and data shared between participants in the join.

As always you can find the entire code example on github.

Libbitcoin-Explorer: Bitcoin Transaction via Command Line

Libbitcoin Explorer provides a useful toolkit of command-line tools for performing bitcoin functions.

Libbitcoin Explorer exposes commands for specific bitcoin hashing functions as well as encoding. It also provides for a rich set of commands for building, signing and broadcasting transactions to the bitcoin network. In addition, it allows the user to make blockchain calls from the command line to query information such as block height, address balance and unspent transaction output.

This makes constructing a transaction from the command line a valuable learning experience as well as a hardcore bitcoin spartan pastime.

To start with, we are going to need to make sure we have libbitcoin-explorer installed, which luckily can be done by building the source files or install a simple executable.

After that we’re going to need to make sure we are utilizing the testnet, unless you want to practice spending real bitcoins in which case ignore the following.

If you have bx installed you can use the settings command to check what current settings are being used. With the default configuration this should return standard mainnet settings.

alpha$ bx settings

We can check the current height of the blockchain with the command:

alpha$ bx fetch-height

Now the number returned should start with a 4, or 5, depending on when you read this post. However, that is the height of the actual, legitamate multi-billion dollar blockchain. We would like to inspect and work with, explore if you will, the testnet blockchain.

To do this we can pass an argument with the specific server we want to query. The following example fetches the height from the address of a testnet server we pass as an argument.

alpha$ bx fetch-height tcp://testnet1.libbitcoin.net:19091

This should return a much larger block-height probably starting with a 1. If we want to use this configuration consistently we are going to need a config file. The default one provided by the developers works fairly well so I  simply copy and pasted everything from this config file into a new file call “bx-testnet.cfg” and saved that file on my desktop.

Then, I opened it up in sublime and scrolled down to the server section, where I uncommented the testnet server address and put a hashtag(comment-symbol #) in front of the previously used mainnet server. After I edited it, the server portion looked like this:

[server]
# The URL of the default hidden testnet libbitcoin query service.
#url = tcp://rmrai2ifbed2bf55.onion:19091
# The URL of the default testnet libbitcoin query service.
url = tcp://testnet.libbitcoin.net:19091
# The URL of the default hidden mainnet libbitcoin query service.
#url = tcp://sqax52n5enkw4dsj.onion:9091
# The URL of the default mainnet libbitcoin query service.
#url = tcp://mainnet.libbitcoin.net:9091

Once I have these settings set and the file saved on my desktop I can begin using the -c command line argument to pass the configuration file to calls that I want to use on the testnet. By dragging the file from the desktop to the terminal window, I can get the exact path of the file.

alpha$ bx fetch-balance n2ge1S4bLDvJKx8AGXrK5JHY2D5cReVytu -c /Users/alpha/Desktop/bx-testnet.cfg

The previous command should return a JSON formatted response with testnet balances for this address.

Now, in order to create my transaction I’m going to need to collect a UTXO from my wallet to spend. Luckily BX has a command for this purpose. All I need to do is pass the address I want to spend from along with the amount I want to spend, as well as my config file.

I’ll look for a 1 bitcoin utxo, which inputted as satoshi’s(a one followed by eight zeros).

alpha$ bx fetch-utxo 100000000 n2ge1S4bLDvJKx8AGXrK5JHY2D5cReVytu --config /Users/alpha/Desktop/bx-testnet.cfg

Again, a nicely formatted JSON response should be displayed:

points
{
 point
 {
     hash ce7f741625dfa86a50a1f18e3664e927441e27ef2f1c526e3aff8ea6c7a650fd
     index 0
     value 148292700
 }
}

Now I can encode the first part of my transaction, the inputs and outputs. My address came up with a UTXO that is slightly bigger than the 1 btc I want to send so I’ll have to make two outputs for this transaction. BX has a tx-encode command that will allow use to pass inputs and outputs for encoding in the format: BX -i UTXOhash:index -o destinationAddress:satoshiAmount

 
alpha$ bx tx-encode -i ce7f741625dfa86a50a1f18e3664e927441e27ef2f1c526e3aff8ea6c7a650fd:0 -o mnrnjVFimDFrNkszzMtecr4yrMKmEuMRbv:100000000 -o n2ge1S4bLDvJKx8AGXrK5JHY2D5cReVytu:386772661 

Note the two outputs, one with the change output minus 2000 satoshis for the implicit fee and the other with the 1 BTC payment. My output looked like this:

0100000001fd50a6c7a68eff3a6e521c2fef271e4427e964368ef1a1506aa8df2516747fce
0000000000ffffffff0200e1f505000000001976a914508937dbc842526b26a66b6a3a7f80
172713135f88acb5ae0d17000000001976a914e82f89457f9efaab09b3222b5f7f82b4ab82
683288ac00000000

In order for this transaction to be valid we will need to sign it. It may be helpful here to open a new terminal window to perform some helper commands. BX’s input-sign command is going to need to take a private key, the previous output script and the encoded transaction from the last step.

Now, we can use a mnemonic seed from our wallet to get the public/private key pair that corresponds to this address. We can now pass all these arguments to our command.

alpha$ bx input-sign 2362a8YOUR-PRIVATE-KEY-HERE86f654bab5 "dup hash160 [02e6705c1dfbaadb92254bc5958820feedd98de6859a321fdb4ea335db0a2b2c97] equalverify checksig" 0100000001fd50a6c7a68eff3a6e521c2fef271e4427e964368ef1a1506aa8df2516747fce0000000000ffffffff0200e1f505000000001976a914508937dbc842526b26a66b6a3a7f80172713135f88acb5ae0d17000000001976a914e82f89457f9efaab09b3222b5f7f82b4ab82683288ac00000000

The output should be an endorsement for the transaction.

3044022055967cd2c32aeb12d09be138f218f6837968fe56aa2a811b7285d7d4eec82497022048cd87ff7a2b50cda55c2871a1fbf722bbc0a5855b91d445a5c912cd900bf66701

Now, using the input-set we can assign this endorsement along with the public key and the previously serialized transaction to create the transactions final form.

alpha$ bx input-set "[3044022055967cd2c32aeb12d09be138f218f6837968fe56aa2a811b7285d7d4eec82497022048cd87ff7a2b50cda55c2871a1fbf722bbc0a5855b91d445a5c912cd900bf66701] [02e6705c1dfbaadb92254bc5958820feedd98de6859a321fdb4ea335db0a2b2c97]" 0100000001fd50a6c7a68eff3a6e521c2fef271e4427e964368ef1a1506aa8df2516747fce0000000000ffffffff0200e1f505000000001976a914508937dbc842526b26a66b6a3a7f80172713135f88acb5ae0d17000000001976a914e82f89457f9efaab09b3222b5f7f82b4ab82683288ac00000000

The resulting transaction should be our fully signed and serialized transaction

0100000001fd50a6c7a68eff3a6e521c2fef271e4427e964368ef1a1506aa8df2516747fce000000006a473044022055967cd2c32aeb12d09be138f218f6837968fe56aa2a811b7285d7d4eec82497022048cd87ff7a2b50cda55c2871a1fbf722bbc0a5855b91d445a5c912cd900bf667012102e6705c1dfbaadb92254bc5958820feedd98de6859a321fdb4ea335db0a2b2c97ffffffff0200e1f505000000001976a914508937dbc842526b26a66b6a3a7f80172713135f88acb5ae0d17000000001976a914e82f89457f9efaab09b3222b5f7f82b4ab82683288ac00000000

the transaction can now be inspected and validated using various libbitcoin-explorer commands.

alpha$ bx tx-decode 0100000001fd50a6c7a68eff3a6e521c2fef271e4427e964368ef1a1506aa8df2516747fce000000006a473044022055967cd2c32aeb12d09be138f218f6837968fe56aa2a811b7285d7d4eec82497022048cd87ff7a2b50cda55c2871a1fbf722bbc0a5855b91d445a5c912cd900bf667012102e6705c1dfbaadb92254bc5958820feedd98de6859a321fdb4ea335db0a2b2c97ffffffff0200e1f505000000001976a914508937dbc842526b26a66b6a3a7f80172713135f88acb5ae0d17000000001976a914e82f89457f9efaab09b3222b5f7f82b4ab82683288ac00000000 -c /Users/alpha/Desktop/bx-testnet.cfg

Or push the Transaction to the network:

alpha$ bx send-tx 0100000001fd50a6c7a68eff3a6e521c2fef271e4427e964368ef1a1506aa8df2516747fce000000006a473044022055967cd2c32aeb12d09be138f218f6837968fe56aa2a811b7285d7d4eec82497022048cd87ff7a2b50cda55c2871a1fbf722bbc0a5855b91d445a5c912cd900bf667012102e6705c1dfbaadb92254bc5958820feedd98de6859a321fdb4ea335db0a2b2c97ffffffff0200e1f505000000001976a914508937dbc842526b26a66b6a3a7f80172713135f88acb5ae0d17000000001976a914e82f89457f9efaab09b3222b5f7f82b4ab82683288ac00000000 -c /Users/alpha/Desktop/bx-testnet.cfg

Libbitcoin: Broadcasting a Transaction to the Network

Broadcasting a transaction with libbitcoin is as simple as making function call, not unlike checking an addresses balance.

This makes it easy for us to append this functionality to our existing raw transaction script. If you haven’t already read about creating a raw transaction, click here.

Now all we have to do is add the connection settings to our script and write two callback handlers. Both will have the same functionality, returning an error code’s message, this will let us know if the broadcast succeeded.

Like So:

 client::connection_type connection = {};
 connection.retries = 3;
 connection.timeout_seconds = 8;
 connection.server = config::endpoint("tcp://testnet.libbitcoin.net:19091");

 client::obelisk_client client(connection);

 if(!client.connect(connection))
 {
 std::cout << "Fail" << std::endl;
 } else {
 std::cout << "Connection Succeeded" << std::endl;
 }
 
 static const auto on_done = [](const code& ec) {

 std::cout << "Success: " << ec.message() << std::endl;

 };

 static const auto on_error2 = [](const code& ec) {

 std::cout << "Error Code: " << ec.message() << std::endl;

 };

Now, we simply need to call the client’s broadcast function and pass both our handlers and the transaction object that was formed by our script. Followed by the wait function.

 client.transaction_pool_broadcast(on_error2, on_done, tx);
 client.wait();

As usual we can compile this with g++ and run it.

 alpha$ g++ -std=c++11 -o rawTX rawTX.cpp HD_WalletTESTNET.cpp $(pkg-config --cflags libbitcoin --libs libbitcoin libbitcoin-client)
 alpha$ ./rawTX

The output should look similar to this. Our transaction can also be verified by checking the block explorer at blockcypher.com

BroadcastTX

As always, the sample code in its entirety can be found on github.